
Tech Tip
How to remove a Gen III – V door panel without damaging it
2003 – 2010 Viper Window Regulators
A common problem with Gen III – V Vipers is when the “smart glass” door windows fail to lower when you open or close the door, causing the glass to hit the body. The most likely cause is the plastic window regulator has broken and needs to be replaced. Replacement regulators are no longer available which means you need to send them out to be rebuilt.
With Gen III/IV Vipers, its easy to damage the door panels when removing them. Follow the guide below to learn how to remove the door panel without damaging it.
Tools needed
Philips screwdriver
Pick tool
1/4” ratchet
3/16” hex socket
10mm socket (magnetic socket optional)
Trim removal tool
VIdeo Tutorial
How-to Guide
Step 1
To remove the door panel, begin by removing the 3 screws that secure the speaker.
Step 2
Remove the silver metal door handle cover by removing the hex head socket bolt.
Step 3
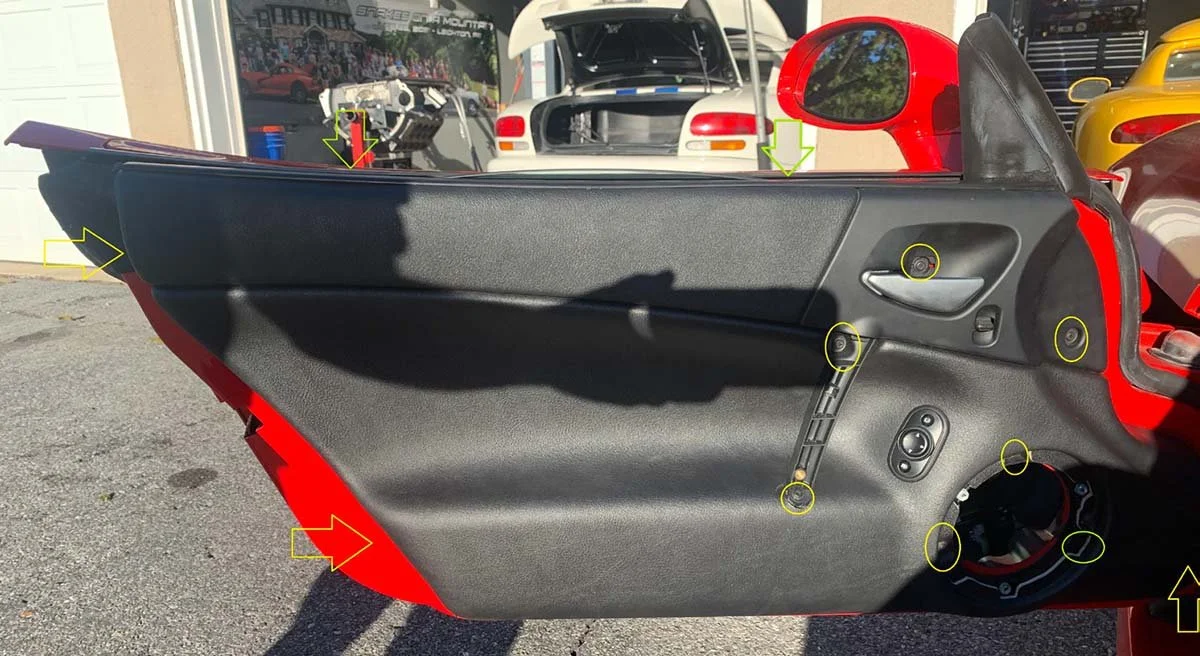
Remove the 3 push pins on the side of the panel (yellow arrows on the photo below)
Note: To remove the push pins on the side of the door panel, push the center of the pin in one click.
Step 4
Remove the 7 Phillips screws (yellow circles on the photo below
Step 5
The only things holding the door panel to the door at this point are the two metal clips that attach to the black trim piece on the door panel. Use the trim removal tool to release these clips.
To locate the clip locations, stick your finger between the window seals and run your finger along the trim pointing towards the door panel and you should feel your finger brush the clips. Using the trim tool, carefully push the bottom of the door panel outward slightly, and gently work the panel outward and upward. It’s easier to start with the outer clips first. Once the first clip comes up and out, do the same on the inner clip.

Trim removal tool

Step 6
Remove electrical connectors and door handle cable. The window controller can either be removed from the door panel to access the connector or removed from the backside of the panel.
Step 7
Once the door panel is removed, remove the inner window seal
Step 8
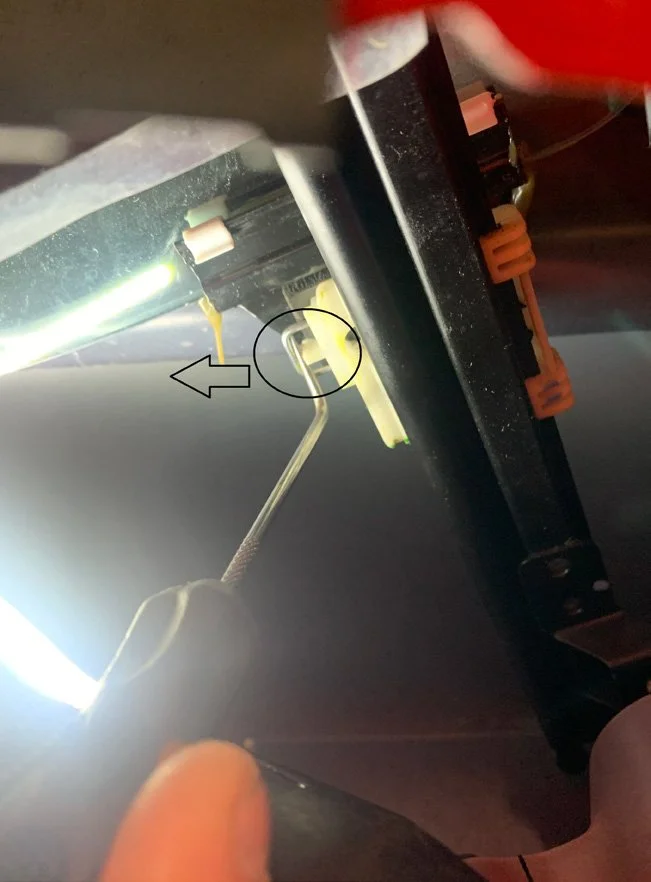
While looking into the speaker hole, lower the window down until you see the clip that is holding the window to the inner window track (photo below). Use a pick tool and pull the clip away from the window track, being careful not to lose the clip.
Step 9
Roll the window down all the way until you see the two black bolts for the window on the outer track (photo below). Having a magnetic 10mm socket will make it easier not the lose these bolts. Have an assistant hold the window glass in place and remove the two window bolts, and pop the inner window track holder out.
Lift and remove the window.
Step 10
Remove the vapor barrier covering the window motor.
Step 11
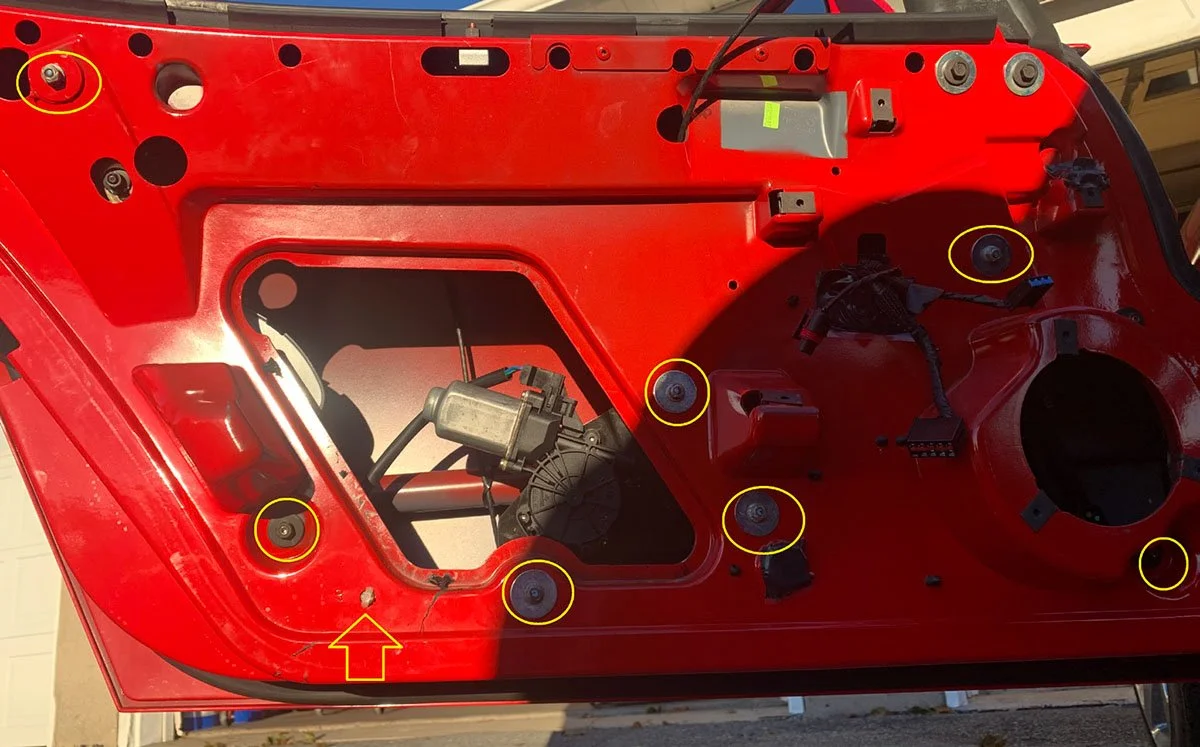
Unplug the electrical connector for the window motor. The connector is located where the white clip is next to the window motor (yellow arrow in the photo below).
Step 12
Remove the 7 nuts holding the window regulator and track assembly (yellow circles on photo below).
Once the motor and track mounting hardware are removed, push the assembly towards the front of the door, while making sure you do not catch or damage the cable and wiring in the door. Remove the outer track first, and pull the rest of the assembly out.
Step 13
To have your regulator and motor assemblies rebuilt, we recommend sending them to Power Window Repair. Visit their site here and complete the repair form.
Step 14
Installation of the rebuilt regulator assembly is the reverse of these disassembly steps.
Have a question? We’re here to help
Contact us if you need any help or advice on your projects.